Raised bed gardening is a simple technique that can improve the health and productivity of your garden. Raised beds have better soil structure and drainage, allowing the soil to warm up earlier in the season, and giving you a head start on spring.
Stubborn perennial weeds can be less of a problem in raised beds than in other gardens. You may also want to construct a raised bed to bring the soil up to a more comfortable working level. Whether for aesthetics or accessibility, modern gardeners are rediscovering the centuries-old technique of raised bed gardening for their vegetables, flowers and shrubs.
Raised Ground Beds
The simplest form of raised beds are flat-topped mounds, usually six to eight inches high. They require no materials other than additional soil.

Bring in additional soil to form the beds, or excavate three to four inches of soil from pathways between beds. If you bring in additional soil, be sure that it does not come from an area where soil borne plant pathogens or contaminants like lead and pesticides are present. Whether you dig out your pathways or not, be sure the access areas around the raised beds are at least 24 inches wide.
Decide first on the size of your raised ground bed. If you are able to reach only one side of the bed, the maximum width should be 2½ feet. If you have access from both sides, the bed can be up to five feet wide. Length and shape are entirely up to you.
To make the bed itself, add four to six inches of finished compost, peat moss or well-rotted manure to the existing area. Thoroughly till it into the underlying soil. Tillage will not be a normal practice in the raised bed. Shape the tilled soil into a flat mound about eight inches high, with sides that taper up at a 45-degree angle. Let the soil rest and settle for a week or two before planting.
Avoid stepping on the raised bed, which will compact the soil. Use a hoe to reach weeds in the middle of the bed. Similarly, lean on the hoe to harvest from the center of the garden. Try to keep the sides of the mound intact, so your raised bed does not slump out onto the pathways.
As the season progresses, the soil will settle, but the mound will remain. Once created, raised ground beds need only minor reshaping with a rake at the start of each season. Each season add organic matter to the surface as a mulch during the growing season or after harvest. Earthworms and other soil organisms will bring it down into the soil, so there is no need to till it.
Supported Raised Beds
Edging your raised bed places an important barrier between your garden and the lawn, the biggest source of perennial weeds. The frame, whether wood, stone, brick or plastic, adds a neat, finished look. Some gardeners also leave a four-inch border of bare or mulched soil around the bed to make mowing easier.

When deciding on the shape and size for a supported raised bed, keep in mind that some edging materials only allow angular corners. Prepare the soil as before, but place the frame around the bed before raking the soil into shape.
Unlike an unsupported bed, you can make a supported raised bed wider than five feet. Sturdy wooden sides can support a wide plank used as a bridge and moved from one part of the garden to another, so that you would be able to reach the center of the garden without stepping on the soil.
To make a wooden frame, cut pieces of 2″ x 6″ untreated rot resistant lumber like cedar. Railroad ties, unless extremely well weathered, are not a good choice for raised bed. Railroad ties treated with creosote are toxic to plants. Lumber treated with copper, chromium and arsenic (CCA) is also harmful to vegetable crops because some of the arsenic may leach out of the wood and into the plants.
Turn the boards “heartwood in” so that if they warp, they will curve slightly outward at the middle. Secure the corners with decking screws. Remove or add soil as needed to make sure the frame is sitting level. Once the frame is in place, spread the soil even with the top. Now you can plant right to the bed’s edge. You will have a larger growing space than in a raised ground bed of the same area, since you do not have to maintain the sloping sides.
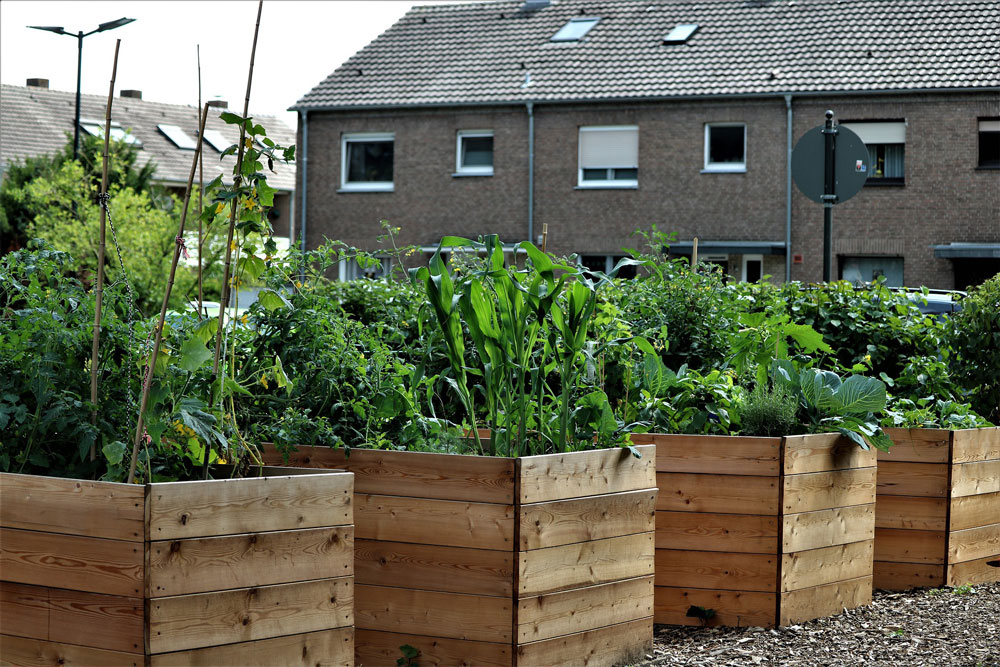
Containerized Raised Beds
A raised bed with 10″ to 12″ walls offers more protection to plants in high-traffic areas near sidewalks. In paved areas where reflected heat can stress plants, raising a bed to one or two feet can reduce heat. Raised beds with even higher walls maximize physical accessibility and reduce maintenance. For most wheelchair users, 27″ is a comfortable working height, but you can custom-build the beds to any height. Choose the width to match your arm’s reach.

To make a planter 27″ high, place one 2″ x 4″ and three 2″ x 8″ boards horizontally, with 2″ x 4″ boards vertically for reinforcement, especially at the corners. Build the sides first, again turning the boards “heartwood in.” Use decking screws to attach the vertical reinforcing boards and to join the corners. You can make a sitting ledge by attaching a 1″ x 4″ board flat on top of the frame, extending it over the sides.
Fill the planter with a mixture of soil and organic matter, and add two to four inches more each year as the soil settles and ages. Remember that containers, even large ones, need extra watering.
Thanks to University of Minnesota Extension Service